

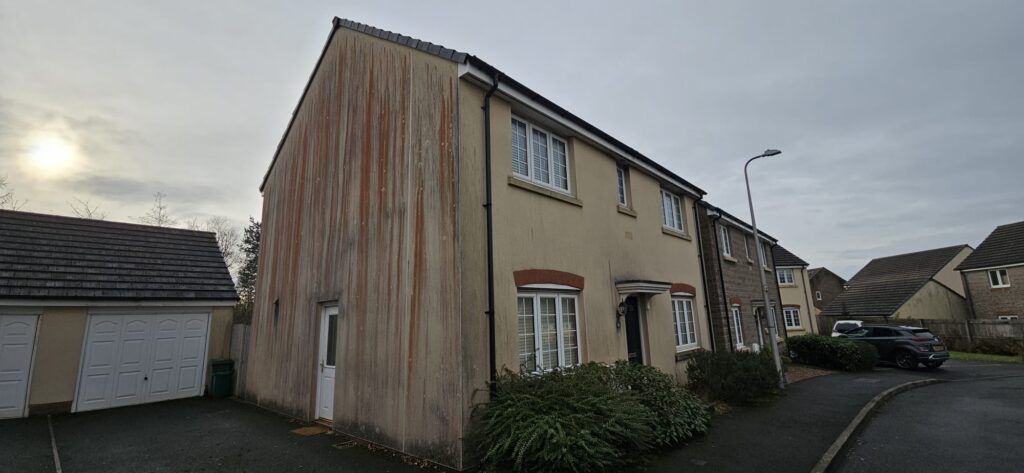
Winter can be tough on exterior walls. Rain, frost, damp conditions and shorter daylight hours create the ideal environment for organic growth to thrive on rendered properties. By the time spring arrives, many homeowners notice that their once-clean render has developed unsightly staining, green algae, red algae, black mould or general discolouration.
Spring is widely regarded as the best time of year to clean render. Temperatures begin to rise, surfaces dry more consistently, and properties can be restored before the busy summer months. Whether your home has silicone render, monocouche render, acrylic render or painted render, following a professional checklist ensures the surface is cleaned safely and effectively.
For specialist render cleaning throughout the UK, visit Soft Washing UK for professional advice and expert cleaning services.
Why Spring Is the Best Time to Clean Render
Spring offers ideal conditions for exterior cleaning because winter contamination is fresh while the weather is generally mild enough for soft washing treatments to perform effectively.
Benefits include:
| Benefit | Why It Matters |
|---|---|
| Removes winter grime | Eliminates dirt accumulated over months of wet weather |
| Kills organic growth | Treats green algae, red algae, mould and lichen before rapid summer growth |
| Improves kerb appeal | Brightens the property for the warmer months |
| Prevents long-term staining | Organic growth becomes harder to remove the longer it remains |
| Protects render | Reduces moisture retention that can shorten render lifespan |
Step 1 – Inspect the Entire Property
Professional render cleaning always begins with a thorough inspection.
Areas to check include:
- North-facing walls
- Areas beneath trees
- Around gutters and downpipes
- Behind shrubs
- Around conservatories
- Garage walls
- Chimney breasts
- Garden walls
The inspection identifies:
- Green algae
- Red algae
- Black mould
- Lichen
- Moss
- Surface staining
- Hairline cracks
- Loose render
- Failed sealants
Cleaning damaged render before repairs can sometimes worsen existing defects, so identifying structural issues first is essential.
Step 2 – Identify Your Render Type
Not all render systems should be cleaned the same way.
| Render Type | Typical Cleaning Method |
|---|---|
| Silicone render | Low-pressure soft washing |
| Monocouche render | Soft washing with specialist detergents |
| Acrylic render | Controlled soft washing |
| Mineral render | Gentle chemical treatment |
| Painted render | Low-pressure cleaning with paint-safe products |
Using the wrong method can permanently damage modern render finishes.
Step 3 – Check for Organic Growth
Many homeowners assume render simply becomes dirty with age.
In reality, most staining is biological.
Common spring contaminants include:
| Contaminant | Appearance |
|---|---|
| Green algae | Green patches on shaded walls |
| Red algae | Red or pink staining, often difficult to remove |
| Black mould | Dark spots or streaks |
| Lichen | White or grey crusty patches |
| Moss | Thick green clumps in damp areas |
Green algae and red algae often appear together, particularly on properties surrounded by trees or exposed to regular rainfall.
Removing both organisms professionally prevents rapid regrowth.
Step 4 – Examine Gutters and Roof Drainage
Overflowing gutters contribute significantly to render staining.
Check for:
- Leaking joints
- Blocked downpipes
- Overflow marks
- Moss washing down from roofs
- Constant dripping
Water continually running over render encourages algae growth and permanent staining.
Cleaning the render without addressing drainage issues usually results in contamination returning quickly.
Step 5 – Protect Surrounding Areas
Professional render cleaning involves careful preparation.
Before cleaning begins, contractors normally protect:
- Plants
- Flower beds
- Garden furniture
- Outdoor sockets
- Lighting
- Wooden decking
- Patios
- Windows
This preparation helps ensure cleaning products remain exactly where they are intended.
Step 6 – Avoid High Pressure Washing
One of the biggest mistakes homeowners make is pressure washing render.
High-pressure cleaning can:
| Risk | Result |
|---|---|
| Remove protective coatings | Shortens render life |
| Cause cracks | Water enters behind render |
| Damage coloured finishes | Patchy appearance |
| Increase water absorption | Encourages future staining |
| Force water into walls | Potential damp issues |
Professional soft washing uses specialised cleaning solutions instead of excessive pressure.
Step 7 – Apply Professional Soft Washing Treatments
Soft washing focuses on treating the biological contamination rather than blasting it away.
The process usually involves:
- Surface assessment
- Application of specialist cleaning solution
- Controlled dwell time
- Gentle rinsing if required
- Post-treatment biocide
This method provides a far more thorough clean than pressure washing alone.
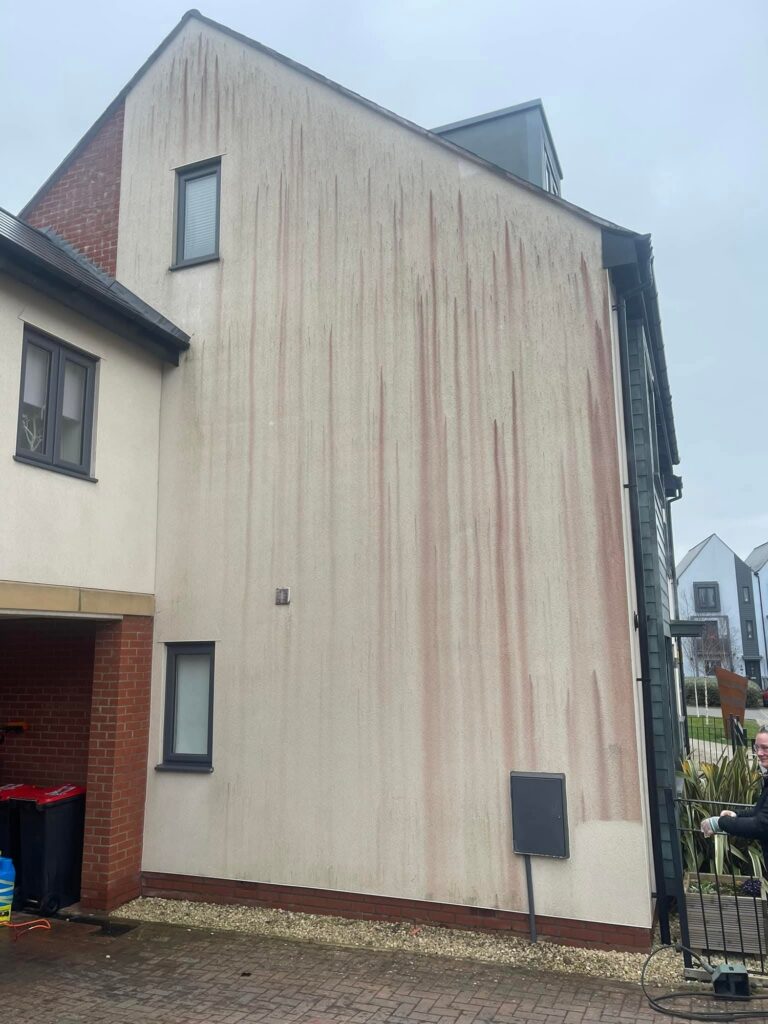
Step 8 – Treat Red Algae Properly
Red algae has become increasingly common across the UK.
Unlike green algae, it penetrates deeper into the render surface.
Characteristics include:
- Pink staining
- Rust-coloured patches
- Orange-red discolouration
- Deep surface contamination
Professional chemical treatments are usually required to fully eliminate red algae without damaging the render.
Step 9 – Remove Green Algae Safely
Green algae often spreads across:
- North-facing elevations
- Garden walls
- Garage walls
- Boundary walls
- Shaded areas
Although it appears harmless, green algae traps moisture against the render.
Over time this encourages:
- Dark staining
- Dirt accumulation
- Faster biological growth
- Surface deterioration
Proper soft washing removes the algae while also killing remaining spores.
Step 10 – Inspect Around Windows and Doors
These areas commonly develop staining because moisture remains trapped around seals.
Pay particular attention to:
- Window sills
- Door surrounds
- Expansion joints
- Air vents
- External lighting
- Utility boxes
Cleaning these details dramatically improves the overall appearance of the property.
Step 11 – Check for Paint or Sealant Failure
Some rendered properties have painted finishes.
Look for:
| Issue | Possible Cause |
|---|---|
| Flaking paint | Moisture trapped beneath coating |
| Bubbling | Water ingress |
| Peeling | Ageing paint |
| Cracks | Movement within render |
| Discolouration | Organic contamination |
Cleaning should only proceed once loose paint has been assessed.
Step 12 – Assess Previous Cleaning Attempts
Many homeowners have attempted DIY cleaning before calling professionals.
Signs include:
- Pressure washer marks
- Stripe patterns
- Uneven colouring
- Patchy staining
- Bleached areas
These often require specialist restoration techniques to improve the finish.
Step 13 – Schedule Cleaning Before Summer
Leaving contamination until late summer often allows algae to become more deeply established.
Cleaning during spring offers several advantages.
| Spring Cleaning Advantage | Benefit |
|---|---|
| Cooler temperatures | Cleaning products work effectively |
| Less pollen contamination | Cleaner finish |
| Better drying conditions | Improved treatment performance |
| Stops summer growth | Longer-lasting results |
| Improves appearance | Ideal before outdoor entertaining |
Step 14 – Consider Preventative Treatments
Professional render cleaning is about more than removing visible dirt.
Preventative biocide treatments help suppress future biological growth.
Advantages include:
- Slower algae regrowth
- Cleaner appearance for longer
- Reduced maintenance
- Better moisture control
- Longer render lifespan
This is particularly beneficial for properties surrounded by trees or located in damp environments.
Step 15 – Budget for Professional Cleaning
The cost of professional render cleaning varies depending on several factors.
These include:
- Property size
- Access requirements
- Height
- Amount of contamination
- Render type
- Previous damage
Indicative pricing:
| Property Type | Typical Professional Cost |
|---|---|
| Small bungalow | £700–£1,000 + VAT |
| Semi-detached house | £900–£1,400 + VAT |
| Detached property | £1,400–£2,200 + VAT |
| Large executive home | £2,200–£4,000 upwards + VAT |
Premium soft washing services often cost more because they use specialist equipment, commercial-grade treatments and experienced technicians rather than relying on aggressive pressure washing.
Spring Render Cleaning Maintenance Checklist
Use this checklist every spring.
| Task | Complete |
|---|---|
| Inspect render for staining | ☐ |
| Check for green algae | ☐ |
| Check for red algae | ☐ |
| Inspect gutters | ☐ |
| Check downpipes | ☐ |
| Look for cracks | ☐ |
| Examine painted surfaces | ☐ |
| Remove nearby vegetation | ☐ |
| Book professional cleaning | ☐ |
| Apply preventative treatment | ☐ |
Common Mistakes to Avoid
Many render problems are made worse by well-intentioned DIY cleaning.
Avoid these common mistakes:
| Mistake | Potential Consequence |
|---|---|
| Pressure washing | Surface damage |
| Using household bleach | Patchy finishes |
| Ignoring red algae | Permanent staining develops |
| Cleaning only visible dirt | Organic growth returns quickly |
| Skipping post-treatment | Faster regrowth |
| Cleaning damaged render | Further deterioration |
| Using stiff wire brushes | Surface scratching |
| Delaying maintenance | Increased cleaning costs |
How Often Should Render Be Cleaned?
There is no universal schedule because every property is exposed to different conditions.
Homes surrounded by mature trees or located in damp rural environments often require more frequent maintenance than properties in open, sunny locations.
General guidance includes:
| Property Environment | Recommended Inspection | Professional Cleaning |
|---|---|---|
| Urban property | Every spring | Every 4–6 years |
| Rural property | Every spring | Every 2–4 years |
| Coastal property | Every spring | Every 2–3 years |
| Heavily shaded property | Every spring | Every 2–3 years |
Annual inspections allow early signs of green algae, red algae and mould to be identified before extensive staining develops.
Signs Your Render Needs Cleaning Immediately
Sometimes waiting until the following spring is not advisable.
Arrange a professional inspection if you notice:
- Green streaks spreading after rainfall
- Red algae becoming darker or more widespread
- Black staining beneath gutters
- White lichen patches appearing across elevations
- Damp-looking walls that never seem to dry
- Dirty patches that remain after rain
- Organic growth around windows and doors
- Increased staining on north-facing walls
Early intervention is almost always simpler and more cost-effective than restoring heavily contaminated render.
For safe, professional soft washing and expert render maintenance, visit Soft Washing UK to keep your rendered property looking its best throughout the year while protecting the finish from damaging biological growth.
Why Professional Soft Washing Delivers Longer-Lasting Results
Many homeowners are pleased when the render looks cleaner immediately after washing, but appearance alone doesn’t tell the whole story. The real objective is to remove and kill the biological organisms responsible for staining, rather than simply washing away the visible layer.
Professional soft washing works differently from high-pressure cleaning by targeting the root cause of contamination. Specialist cleaning solutions penetrate the organic growth, breaking it down and killing microscopic spores that would otherwise remain embedded in the render.
This approach offers several advantages:
| Soft Washing Benefit | Why It Matters |
|---|---|
| Treats contamination at its source | Helps prevent rapid regrowth |
| Uses minimal pressure | Protects delicate render finishes |
| Cleans evenly | Reduces patchy results |
| Suitable for modern render systems | Safer for coloured and silicone renders |
| Longer-lasting cleanliness | Reduces maintenance frequency |
Although some very light staining may continue to weather away naturally after treatment, the biological growth itself has been neutralised, allowing the render to improve in appearance over the following weeks.
Weather Conditions That Affect Spring Render Cleaning
Spring generally provides ideal cleaning conditions, but weather still plays an important role in achieving the best possible results.
Professional contractors will usually consider:
- Air temperature
- Surface temperature
- Recent rainfall
- Wind strength
- Overnight frost
- Direct sunlight
Cleaning during extremely wet or freezing conditions can reduce the effectiveness of specialist treatments.
The ideal conditions are often:
| Weather Condition | Suitable? |
|---|---|
| Mild, dry day | ✔ Excellent |
| Overcast but dry | ✔ Very good |
| Light cloud | ✔ Good |
| Heavy rain | ✘ Not recommended |
| Frost | ✘ Delay treatment |
| Strong winds | ✘ May affect application |
| Heatwave with intense sun | ▲ May require adjusted application methods |
Professional scheduling ensures treatments remain on the surface long enough to work effectively.
Why Shaded Walls Become Dirtier
One of the most common questions homeowners ask is why one side of the house looks significantly dirtier than the others.
The answer usually comes down to sunlight and moisture.
North-facing walls receive less direct sunlight, meaning they stay damp for longer after rainfall. Damp surfaces create ideal conditions for both green algae and red algae to develop.
Additional contributing factors include:
- Overhanging trees
- Tall hedges
- Poor airflow
- Nearby woodland
- Constant shade from neighbouring buildings
These environmental factors explain why one elevation may require cleaning more frequently than another.
The Importance of Annual Visual Inspections
Even if your render appears clean, carrying out a visual inspection every spring can identify problems before they become expensive.
Look closely for:
- Tiny green spots beginning to develop
- Small patches of red algae
- Dark marks beneath gutters
- Fine cracking around windows
- Loose sealant
- Water staining around downpipes
Catching these issues early often means lighter maintenance rather than extensive restoration later.
Keeping a simple record each spring can also help monitor any gradual changes.
| Inspection Item | Notes |
|---|---|
| Organic growth | Increasing / Stable / None |
| Gutter condition | Good / Needs repair |
| Render colour | Even / Fading |
| Cracks | None / Minor / Significant |
| Drainage | Working correctly / Requires attention |
Simple Ways to Keep Render Cleaner Between Professional Visits
While professional cleaning provides the deepest results, there are several practical steps homeowners can take throughout the year to reduce the build-up of contamination.
Regular maintenance can include:
- Trimming back shrubs that touch the walls.
- Preventing climbing plants from attaching to render.
- Clearing leaves from gutters every autumn.
- Repairing leaking gutter joints promptly.
- Improving airflow around shaded elevations.
- Keeping soil and mulch below the damp-proof course.
- Washing dirt from window sills to reduce staining after rainfall.
These simple tasks won’t replace professional soft washing, but they can significantly slow the development of green algae, red algae and other organic growth.
When combined with periodic professional cleaning from Soft Washing UK, a proactive maintenance routine helps preserve the appearance of your property, protects the render from unnecessary deterioration and reduces the likelihood of stubborn staining becoming established over time.